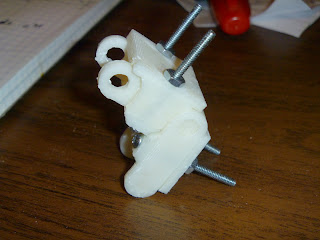
There is not much to say about this. Once I got two of the links printed and assembled so that I knew everything fit together, I bought a few hundred #4-40 3/4 inch machine screws and nuts to hold the parts together. I'd designed the parts to perfectly seat a 3/4 inch machine screw and nut.
When I got home with my trove of fasteners from my stockist I discovered that his Chinese supplier had been making a little extra money by trimming his 3/4 inch screws (0.75 inch) down to 0.714. What that meant was that the screws went all the way through the guide assembly but didn't emerge on the other side to allow the nut to be seated on the end of the machine screw.
My stockist is getting me some 7/8 inch machine screws as replacements and writing a hot note to the warehouse. Quality assurance at the Chinese plant needs a bit of a rework, I think.
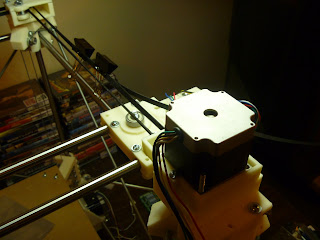
Interestingly, I had designed the holes for the #4 machine screws so that the threads engaged the sides of the holes, so actually nuts weren't required. With that in mind I went ahead and assembled the flexible cable guide for the x-axis. It seems to work perfectly.
I get a tight turn like I'd hoped with no clashing. Right now I am up to 16 inches of a 24 inch assembly for the x-axis. When I get the full 24 inches printed and assembled I will design and print the end mounts.
It will be interestingly how many hours of operation this kind of flexible cable guide will handle before something wears out.


