Wednesday, April 27, 2011

Sampo: The return of Darwin...

Actually, Darwin never really left.


Despite all of the hoopla about Mendel, a very robust Reprap machine which is virally spreading like a bad flu, Darwin derivatives have been quietly building up numbers largely through Bits From Bytes' Darwin-derived Rapman printer.  It would be fairly safe to say that there are upwards of two thousand of these Darwin clones of one flavour or another in the field.


I bought a Rapman 3.0 in the Fall of 2009.


Rapman is basically a Darwin re-engineered for laser cut acrylic plastic instead of printed parts.  I've never been able to decide whether Rapman is a crib of the Ponoko laser cut acrylic Darwin or vice versa. The Rapman was a brilliant choice for me.  I had been working on a series of Repstrap systems.  Early on in 2009 I realised that getting Tommelise 2.0 printing was going to take another half year at the rate I was going and what I really wanted to do was design things with a 3D printer in the design loop.  I saw Batist Lehman's video of his Rapman in action and was sold.


Of course, Rapman has its little ways.  It arrived disassembled as a flat pack.  Inside were several sacks of metric nuts and bolts heavy enough, if put in a sock, to serve as a very effective cosh.  Assembly was a daunting task and once finished there was a strong sense that you don't want to fool around with it for fear that it would break or some apart.


I was puzzled at first that lock washers hadn't been included with the nuts and bolts.  It quickly became apparent, however, that if you put enough torque on nuts to make a lock washer compress the high impact acrylic that Bits from Bytes used would shatter.  The net effect of this was that I keep a bowl beside my Rapman to collect the constant drizzle of nuts and bolts which unscrew themselves and fall on my work table.


Since then I've put well over three thousand hours on my Rapman.  It became apparent some months ago that  Rapman was not a heavy duty machine.  I started seeing stress cracks all over the machine and was faced with a x-axis extruder mounting plate that just crumbled away from the heat of the extruder and the mechanical stress of being moved around.  I replaced it with an equivalent aluminum plate.


Early on Rapman users began to design replacement parts for the bits of the Rapman laser cut acrylic that fell apart.  You can see a corner block designed in white ABS by Chylld in the picture above.


You notice that I only put ONE of Chylld's excellently designed, fast printing corner blocks onto my Reprap machine.  Once I got it on it has performed beautifully.  Unfortunately, I had to half way disassemble my Rapman to get the damned thing installed.  That wasn't an experience that I thought worth repeating.


Late in 2010 I decided that I wanted to experiment with dual extruders.  Bits from Bytes had come out with one some months before and I decided that I would get one.  When I called, they were so focussed on their new 3000 printer that they wanted me to switch over to that and did a hard sell.  I never react positively to hard sells, so I put off the purchase.  As well, the dual head Rapman had the same dimensions as the old one which meant that it had a reduced print table area as a result.


After the beginning of the new year Bits from Bytes was acquired by 3D Systems.  I attended the telephone meeting announcing the takeover and was so put off by the 3D Systems CEO, Abe Reichental, that I abandoned any plans to purchase any more Bits from Bytes equipment at all.


That left me with quite a dilemma.  I had never been particularly happy with the Mendel design.  Tommelise had used very similar kinematics.  The problem with it that it requires a larger footprint than the print table and is unstable in the x axis direction.  Mendel addresses this last issue with a electronics mounting board that doubles as a reinforcing plate to cure the x-axis problem.  Because of that, I decided to stay with the Darwin kinematics and run the system through another kaizen exercise.


Basically, I want to look into several possible improvements to my Rapman
  • a return to printed parts.  My experience has shown that laser cut acrylic does not make for a robust machine.
  • a massive reduction in the variety, as opposed to the number, of parts needed to construct the machine.
  • parts design which allows for easy partial demounting of the printer.
  • a design robust enough to be easily shipped fully assembled or quickly broken down and reassembled for exhibitions
  • room for two extruders without compromising the size of the print table.
  • cleaner y and z axis kinematics
  • a more capable controller board
  • shifting to the successful Wade/Adrian pinch wheel extruder 
My experience with trying to install the Chylld corner on my Rapman has caused me to want to rethink the whole issue of parts design for a Reprap printer.  I feel that we have, in a way, gone wrong when we designed the parts for Darwin and Mendel.  Because you can custom tailor individual parts with a 3D printer doesn't, to me, mean that it is good design practice.  Right now, to have a proper set of spares for a Darwin or Mendel you pretty much have to print a full parts set.  A lot of that stems from, in my opinion, from custom tailoring parts.

I don't think too many Reprappers are going to bite the bullet like Adrian Bowyer and Nophead {Chris Palmer} have and print whole sets of parts day after day and week after week.  Most of us want Reprap machines so that we can design and print other things beside new Reprap machines.  To that end, having a limited set of parts types that you can print a few at a time during down time when you are doing design, seems to me to be the way most of us are going to propagate more printers.

With respect to a new y and z axis design I want to revisit the cabling approach that eD did with the Darwin precursor ARNIE back in 2006.

But, enough talk.  Here is what I have so far.


Sampo's frame is built on a 600 mm module to give it that extra space for dual extruder print frame that Rapman's 400 mm does not. So far, the entire frame has been assembled with exactly five different parts.


Here you can see the Sampo frame beyond my Rapman 3.0 for scale.  I am working on the cable housings for the z-axis as this blog entry goes to press.

Thursday, March 17, 2011

Buying parts


This morning, I bought the linear shafting; 16x2ft 8 mm diameter segments and the linear bearings; 24x8 mm linear bearings.

The first test NEMA 23 stepper and the 24 volt power supply should be arriving today. I plan on using Bogdan's mount design for the linear bearings and an aluminum plate for mounting the extruders. Corner connectors will owe a lot to Chylld's corner designs for the Rapman, though I will not be slavishly following his approach.

I hope to be testing the firmware routines for controlling the steppers this weekend.

Friday, March 11, 2011

Eat your heart out! :-D


Fired up the development board and it fell into a roundabout of pics.


Not bad for a little 320x240 display.

Thursday, March 10, 2011

Development board arrived


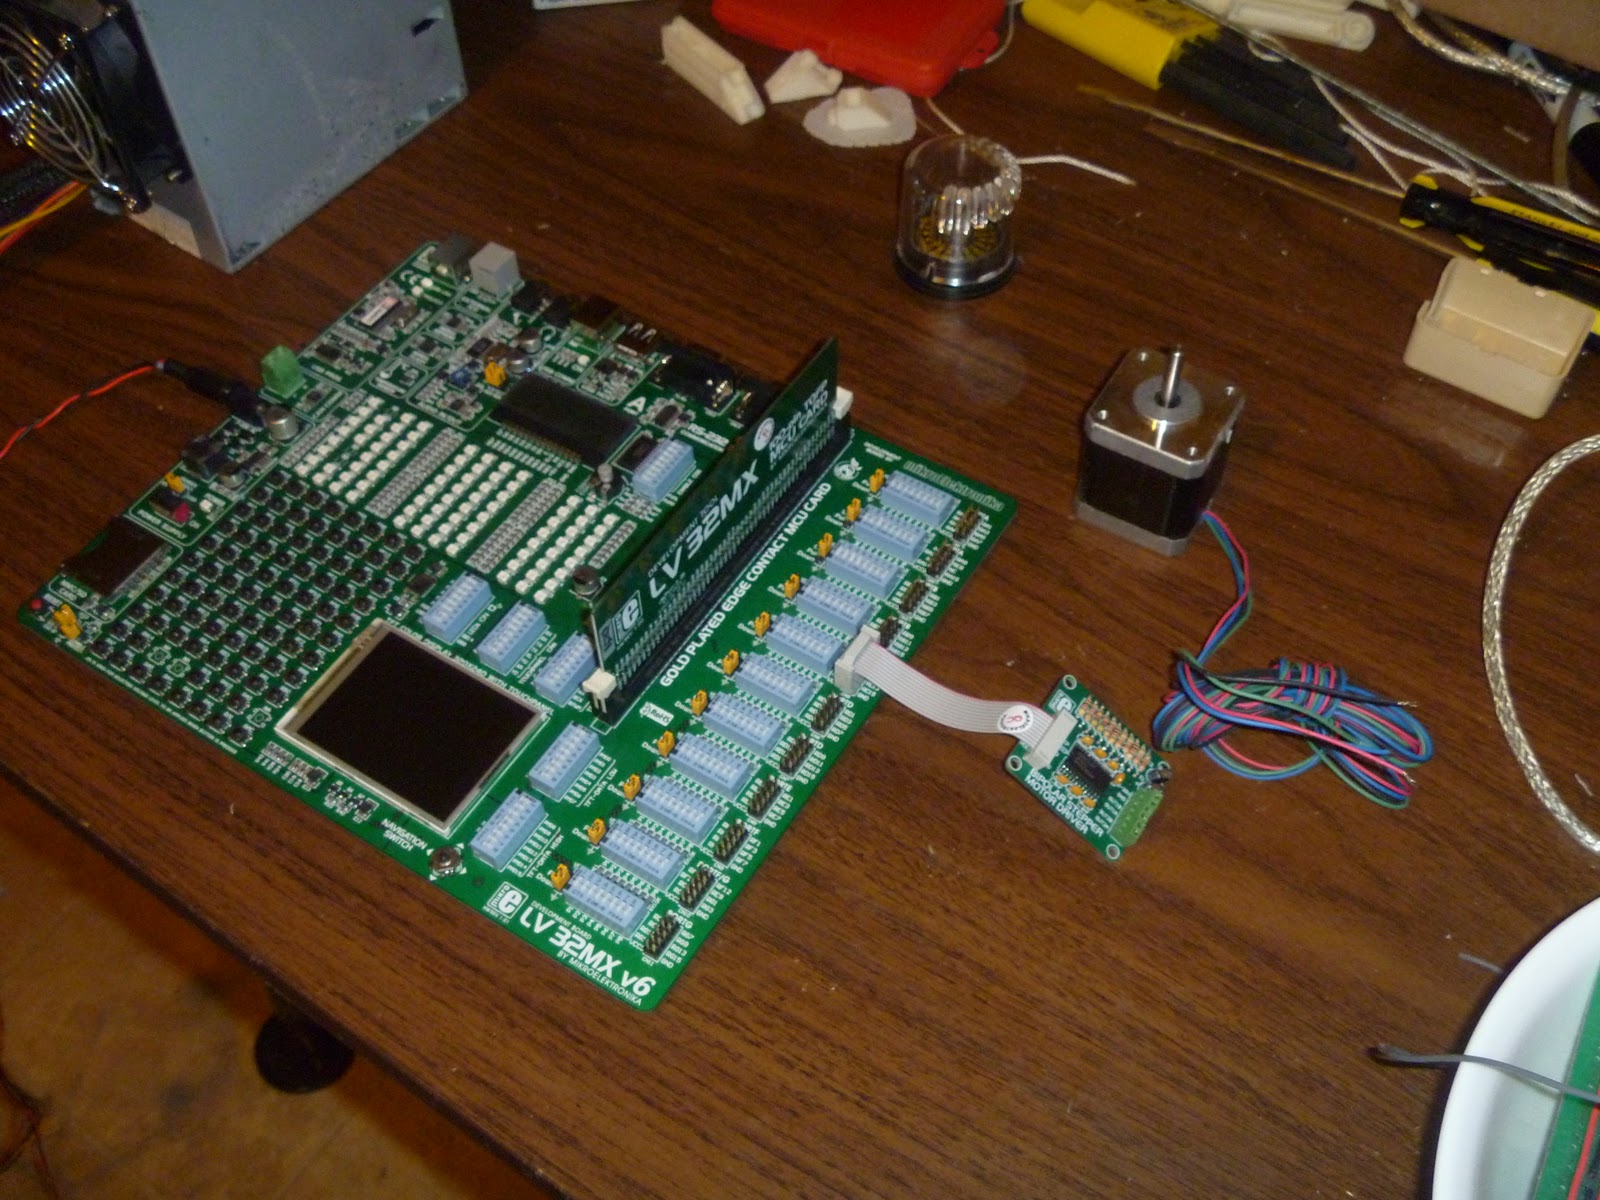
My PIC32 development board arrived today!


I also got a trial stepper motor controller with it.


The development board looks as good in my hands as it did in the sales literature.

My old PC power supply even had a power connector that fit with the board already installed.  It is a relict of a battery charger for an old Sony digital camera that I finally retired last year.

I am also wanting to adopt Rapman's use of milled linear guides and linear bearings.  If you look hard these are not all that expensive.  For bearings, I found this little unit...


To be well within budget.  Guide shafts are a little pricier.  In the US it appears that 12 mm shafting is the least expensive while still being stiff enough for a printer.  Most pricing seems to be running around $0.50/inch.  That's not cheap, but not impossible.

Being a Scots-Irish tightwad, however, I kept looking for a better deal and ran across this...


...which comes in at a bit under $0.07/inch.   I spoke with the vendor today and they are checking to make sure that it meets CNC requirements for a linear guide.  The general impression was that it did, but I want to be sure.

If that price does follow, it should be possible to replace the effective, but overcomplicated z-axis arrangement of Rapman which derives from the old Darwin design...


...which has 8 mm guide rod and a plastic bushing with a 12 mm guide rod and a proper linear bearing.  That extra rigidity might allow me to control the position of the print table with an single, proper lead screw attached to a cantilever beam which contacts the bottom of the print table in the center instead of three or four lead screws, or cheap studding {threaded rods}, more likely.

Certainly the leveraging the guide rods as vertical structural members should simplify the design a bit.

Tuesday, March 01, 2011

Going for 32 bit embedded processors


In which your narrator begins to cobble a next-generation Reprap controller board together out of much bigger vitamins than has previously been possible.

The controller for the Bits from Bytes Rapman has long been the most sophisticated in the world of Reprap printers. It's use of the PIC32 MCU gives it the power to do things, like support an LCD display, SD cards and 0.1 mm gcode steps without difficulty are very difficult to do with 8 bit MCUs. There are two barriers to it's widespread adoption in Reprap printers, however.

The first is that PIC32s typically come as 100 pin surface mount chips. That means that you have to do some fairly sophisticated PCB design and get the damned chip soldered on properly. That's not impossible, but it's not easy, either.

The big barrier, however, has been the lack of inexpensive compilers for PIC32s. The one from Microchip is very good, but costs over $1K. Recently, that situation has been remedied by a Serbian firm, Mikroelektronika. I had had experience with their PIC 18F compiler and found it both very reliable and possessed of an enormous library of library functions which made it extremely valuable as a development tool.

Thus, when I heard last year that Mikroelektronika had undertaken to create an inexpensive compiler for PIC32 chips I was immediately interested. After a long development and beta cycle they did their formal release this morning.  They offer inexpensive C, Basic and Pascal compilers for the PIC32.

Some time ago, I resolved to build up my next printer rather than buy another BfB product.  The ultra-reliable BfB extruder and controller board were two technologies that I intended to bring across.  I wanted, however, to have two extruders and a somewhat bigger print table to accommodate them better than Rapman allows.

Laszlo created an inexpensive, easier to repair hot end than BfB offers which I also intend to use in the design.


As well, recent purchase of a hobby lathe ...


... will let me experiment with large diameter precision lead screws which can double as structural elements should cut down on the amount of steel in the printer rather dramatically.


The big advantage to the new Mikroelektronika compilers, however, is that they also offer an inexpensive line of prototyping boards.  That will save me the development time of putting together a new board with technology that I am not familiar with.  I ordered their most expensive board {$169}...


which includes everything that I need save stepper drivers.  I also ordered one of their stepper driver boards. to test with it to test my firmware with ...


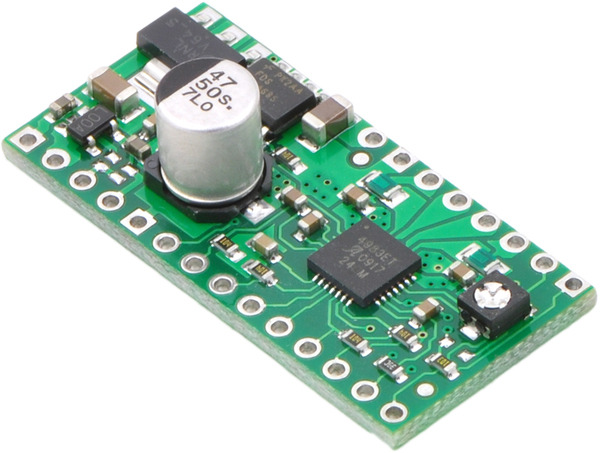
before I integrate the heavier amperage Pololu driver board that has been used in a number of other Reprap controller boards.


The current situation is so much better than we faced when we began the Reprap project in 2005.  Then you were pretty much doomed to building up boards from scratch.  These days you can buy inexpensive boards and add-on miniboards to build up an inexpensive yet very sophisticated Reprap controller board quite easily.

Should my controller design catch on, I suspect that other Reprappers would want to use this much smaller and less expensive graphics board in Mikroelektronika's stable ...


...  which has pretty much everything the larger board does.


Monday, February 14, 2011

Printing small holes in small features


In which your narrator discovers an out-of-the-box method of making small holes for pinned hinges in small features.


Recently, Chris Palmer blogged an exquisite article on the pitfalls of getting the diameters right in holes made in objects. It related very closely to a problem I was having in developing a printed robot hand.


Previously, I'd had no trouble in that the joints between the phalanges of the robotic fingers were very large and printed.


I loved this approach, but sadly had to abandon it simply because the large contact areas between the phalanges created excessive friction and because the number of things that I needed to have happening in a phalang made the large joints unhelpful.  The need for smaller, more compact hinged joints brought to mind the work of Frank Davies with his Sarrus Linkage positioning system.


Frank used pinned hinges to great effect.


As I was designing such pinned hinges into my phalanges, I soon discovered that the substantial pins that Frank was able to use were too large for the delicate phalanges that I was working on.  In fact, I finally settled on using simple paper clips (0.84 mm diameter) for the pins in my work.


In designing the joints, I followed the usual Reprap gambit and simply included the pin holes in the STLs for the parts.


The only problem with this approach was that both the hole and the hinge joint that it was seated in were very small.  The joint had a radius of only 3 mm and the hole 0.42 mm.  


Ordinarily Reprappers use a few print paths around the perimeter and then infill the rest. I design using thin walled parts glued together after printing, an approach that lets me create fine featured parts that are fast to print.  With a feature this small, however, print roads radiating out from the pin hole very quickly clash with print roads radiating in from the joint.


It's bad design practice to let a hot print head hover for extended periods of time over or near a small feature.  You want the head doing the feature then going far away quickly so that the molten plastic thread has a chance to cool a bit before the next layer is applied.  If you don't get this your small feature becomes a featureless blob.


Print road clashing between the pin hole and outer perimeter of the hinge had me fiddling around with print road width for the better part of a week with indifferent results.  Yesterday, however, an out-of-the-box solution to the problem finally hit me.  I'd do better at printing the pin hole if I simply didn't include it in the STL, something like this.


Basically, I just plugged the hole.  What that did is to limit the print road propagation to those radiating inwards from the outside perimeter of the hinge.   Since I don't use infill because of the problems getting the perimeter roads to match with the infill roads, for the first few millimeters of the print had no hole due to the use of perimeter roads to completely fill the layer.


Once I had the roads calculated I pulled up the .PNG images for the completely filled layers.  You can see the bit that will fill the pin hole circled in red.  


It was a simple matter to pull the images into Paint and remove the inconvenient loop from the images and then continue processing the images into Gcode.  


By calculating the width of the print roads appropriately, I was able to get the proper diameter for the pin correct on the first try.


The annoying part of this whole epiphany was that it took me over a week and dozens of trial prints to see the simple way of solving the problem.


Tuesday, January 11, 2011

Restocked


Many months ago, I ordered new filament for my stocks. I order exclusively from New Image Plastics in that I know that Jim Waring there charges low rates and has consistently high quality. What with the economic troubles Jim has had trouble in recent years finding a broker willing to deal with small orders of less common polymers like ABS. He found such a broker recently, though, and was able to fill my order. :-)


Yesterday, my filament arrived; thirty lbs of 3 mm ABS at $7.95/lb and 10 lbs of polypropylene at $4.25/lb. With the ABS I already have, I think I am now set for the year.

Friday, December 24, 2010

A proper conductive polymer mix?


In which your narrator begins to test a new conductive polymer mix.

Do you want to read more?

One of the long term grails of the reprap project is to be able to print circuitry. Currently, Rhys Jones, a PhD candidate working for Adrian Bowyer at the University of Bath, is devoting a lot of his time to addressing this issue.

Heretofore, we've looked at very low temperature eutectic alloys like Rose's and Wood's metal and confected methods of extruding it into preprinted channels.  More recently, Rhys has demonstrated that ordinary solder can be successfully printed onto ABS.

We've looked at various concoctions of carbon, silver and other conductive materials with polymers at arm's length.  Always, though, the conductivity of these mixes has been too low for them to be useful in printed circuits.  Rhys, however, has looked at a two step process which may get us by that.

The main problem with printing PCBs with a reprap machine is that PCBs are not that hard or expensive to have made using conventional, proved materials.  This makes coming up with a method of printing them a bit tricky because it not only has to work, but it also has to yield a product that is not all that much difficult to use than conventional boards.

Recently, I ran across a high-tech company, Integral Technologies, located in Bellingham, Washington.  They've come up with a different approach to creating a conductive polymer mix which uses conductive fibers mixed with conventional polymers.  Probably the most exciting is their mix of very fine stainless steel fibres mixed with a blend of polycarbonate and ABS.

The volume resistivity for this material on the data sheet runs to 0.06 Ohm-meter.  This is far too high for a useful conductive plastic.  I rather shrugged the material off until I got a look at a few non-technical demonstrations of the material.    This one shows two small bars of the material used to conduct 110 v current running an electric drill.

Interestingly, Bill quoted me a price range of between $9-45/lb depending on the composition. More interestingly, the PC/ABS mixes which resemble what we are already used to using in Repraps are at the cheap end of the price spectrum.


As well, they demonstrate measured resistance across an extruded plate of their material using an analog multimeter.


There was obviously a mismatch between what their data sheets said and what the non-tech demos indicated.  I explored this question with Bill Robinson at Integral.  It boils down to the "skinning effect" mentioned in the first clip.  Simply explained, it means that the metal fiber doesn't tend to show up at the surface of an extrusion.  This means that the material is partially insulated at the surface of an extruded surface.

That left the issue of how, in the second demo clip, ordinary multimeter probes registered effectively zero resistance when measuring resistance across a extruded plate of their plastic.

Bill sent me some demo plates of the material a few days ago.  I have a digital multimeter rather than the analog Radio Shack multimeter.


Multimeters are not particularly good at accurately measuring low resistances.  Anything reading below about 5 ohms for most multimeters is not something you want to bet your life on.

I tried duplicating the measurements in the clip and kept running into skinning effects.  In places I could get readings less than 1 ohm, but others I would be in the mega ohm range.  I made a cut across one end of one of the samples.  You could barely see the fiber ends.  Integral is using VERY fine fibres.

I then drilled 1.5 mm holes through the plaques and put the probes through those.  I was able the get more consistent and lower resistance measurements.  Mechanical contact between the probes and the fibre ends is how good conductivity is achieved.


The best I was able to get consistently was 0.6-0.8 ohms over about 100 mm of the material.

Bill at Integral suggested that if we used a 0.5 - 1.0 mm extrusion nozzle we out to be able to avoid jamming of our extrusion nozzle with the stainless steel fibres.  Making strip extrusion as we can with a Reprap printer should tend to align the fibres much better than a simple injection moulding would do.  The problem as I see it will be making a conductive connection between two traces and making a connection between a trace and a component.

The question now is whether what we know about this material now justifies having a sample turned into fibre for further testing.

Sunday, December 19, 2010

Getting into threading...


When I bought my Sherline lathe, I went for the loaded option.  As I am finding out, it was a very good decision.  I don't think I'd have been able to use at all it without the digital readout box.  I understand how people in times pass could have used a micrometer to do measurements between cuts.  I doubt that I could have had the patience, though.


After my last attempt at doing a deep drilling and cutting down a piece of aluminum bar stock, the next thing I wanted to do was use the threading attachment.  Between Joe Martin's Sherline book, Tabletop machining and the Sherline Accessories Shop Guide I was able to puzzle out how to re-rig the lathe for threading.  My motive in getting a threading attachment was to have the possibility to cut my own lead screws and thrust collars.  The studding used in the Rapman and Mendel 3D printers, not to put too fine a point on it, suck the middle out of canned Vienna sausages.  When you buy studding it is rarely, if ever, straight.  When you try using it as a z-axis lead screw, it does not very pleasant things to your print quality.


As well, I am quite fond of the polymer pump design on the Rapman.  My primary reason for wanting to do my own threads was to be able to make the threaded drive shafts for those, too.


The biggest shock for me in this adventure happened when the instructions book told me to demount the lathe motor.  It turns out that you cut threads on the Sherline lathe with a hand-powered handle.  Using it reminds me of my grandmother's old foot pedal powered Singer sewing machine that I learned to use when I was about four.  It has a very similar, 19th century feel to it.


By and large the threading system design is quite good.  The real pain in the tail, however, is that little black lever that you see below the spindle in the above picture.  Getting that to work right had me taking the whole lathe apart about three times.  Sherline needs to rethink that part of the design.  It really sucks.


Other than that, the threading attachment was quite easy to use.  It is set up to do standard and metric 60 degree threads.  The carbide cutting tool did that quite easily.  


For a first try I did a really coarse metric thread, 2 mm.  


I figured that that deep a thread would require the most muscle.  It was a bit tiring but not at all impossible.


For lead screws, the Sherline will handle about 15 inches of threading.  If the diameter of the stock is less that about 9 mm, a longer unthreaded piece of stock can be snaked through the spindle.  Given that manufactured lead screws about cost $1/cm and thrust collars typically cost $30-35, this capability will save me some money over the mid-term.  

Monday, December 13, 2010

First lathe experiments


I finally got a few days off, so this morning I began to do things with my new lathe.

My initial motive in getting the lathe was to have the capacity to make my own extruder hot ends.  Given my total lack of experience with lathes, I decided to see if I could try sinking an 1/8 bore in a piece of aluminum round stock using a fixed drill bit in a chuck inserted into the tailstock.  An idea of what I did can be seen here.


After a considerable time, I was able to sink a 50 mm hole into the centre of the round stock.  The steady rest that you see supporting the end of the aluminum round stock nearest the drill bit reduces vibration and misalignment.


When I worked with Tommelise 1.0, I used a 5/32 inch braised copper tube (1/8 inch ID) hot end several inches long with its top only heated using nichrome wire.  I was able to get well past the whole issue of having filament melt in the PTFE thermal break with that approach.  These days, I hope to do something similar using aluminum.


Here you see the drilled round stock after I've trimmed it down to 12 mm outside diameter and trued up the end.  It takes a nice finish.

Saturday, November 20, 2010

Arrived


The Sherline lathe arrived on Thursday. I was working that night but stayed up extra late and more or less got it assembled. It went together without a lot of drama. The digital readout box makes whether you bought the lathe with American or SI verniers irrelevant since you can select metric or "Imperial" on the digital readout box.

The readout box also includes an optical tachometer to keep track of the rpm rate of the lathe. The DC controller knob will give you stable rotational rates down to about 200-250 rpm.

This morning, I mounted the lathe on a piece of chipboard for stability.


I bought a couple of pieces of aluminum round bar, a piece of stainless round bar and 3 feet of hot rolled steel round bar to practice on.  You can see one of the aluminum round bars mounted in the lathe.

Tuesday, November 16, 2010

Taking a different direction


A few months ago, I had planned on acquiring another BfB Rapman with two print heads this time so that I could explore the use of PLA as a support material for ABS prints.

With the sale of BfB to 3D Systems, continuing troubles with BfB firmware and the catastrophic failure of my expensive Rapman hot end and the discovery that BfB isn't warranting such failures, I've decided to build my own second printer.

To that end, I've just purchased a Sherline 4410 metric lathe.


It will be arriving Thursday.

Thursday, October 28, 2010

Annoyances and changes


UPDATE: I let my anger run away with me in this blog post. I've just spent time with Ulf Lindhe at Netfabb. Ulf has sorted out the problem I was having with the boolean operations and got me upgraded to version 4.6 at no charge.

It's taken a few days, but I can now print at about the same quality with a 0.5 mm extruder as I was able to print with my now ruined 0.3 mm extruder. I've gone back to work on the active telepresence project and the present task is to create linear servos to as the muscles to operate the hand and fingers.  I'm building my own from gearmotors rather than buying after some bad experiences trying to adapt servos designed to operate the flaps and rudders on model airplanes and sailboats to operate hands.  Andreas Maryanto was good at this, but I am definitely not.

Doing this, I am leveraging the herringbone rack and pinion scripts that I wrote.  While Nophead's advice to simply not fiddle with my 0.3 mm hot end settings got me 95% of the way to where I wanted to be, that last 5% took a little tweaking.  I'm quite happy with the final results.


The pinions peeled off of the rafts with a minimum of trouble and only took a touch on the belt sander before they were usable.


That was relatively easy.  When I started working on the rack, however, I quickly ran up against the limits of Art of Illusion.  While it is easy to assemble a set of solids to represent what I want to print in AoI...


Doing the Boolean opeations to make them into one solid is quite beyond AoI's boolean ops capabilities.  Bogdan told me repeatedly that I could do this sort of thing in Netfabb Professional, so I read up on the method and set about to use my now copy and discovered that the Netfabb people had somehow disabled this feature in my copy.  I had a email from them about version 4.6 {I have 4.4} but no clear idea if I was going to get a free upgrade or have to pay them even more to do something that I am already supposed to be able to do.


The more I think about that the more pissed off I get.  If I don't hear from them in the morning, I am going to build boolean ops into Slice and Dice and give it away for free.  The way I feel just now I might just do that anyway.    I am getting sick and tired of getting ripped off.

Wednesday, October 20, 2010

Getting to the bottom of the Rapman hot end failure


In which your narrator gets to the bottom of why it was that his 0.3 mm Rapman hot end failed and perhaps even why it started causing resets prior to the failure.


The hot end failure that I experienced on 14 October is a relatively rare event. The only other person with a Rapman who reports the sort of ABS leakage that I experienced was Klazlo.


Once I had my Rapman repaired and usefully printing again, I turned my attention to doing forensics on the failed hot end. Once I took a hard look at the hot end and the pictures that I took immediately after the failure hints of the means and mode of the failure began to recommend themselves.


Taking a look at one of the forensic pics that I took on the 14th two items jump out at you. I've circled them in red.


If you look closely at the top red ellipse you will notice that one of the three bolts which secures the spacer on the hot end ensemble was either not tightened adequately at the factory or, more likely, worked its way loose via hundreds of heating and cooling cycles while in operation.  This threw the alignment of the hot end out opening a route for hot ABS to escape between the PEEK sleeve and the aluminum extruder barrel sleeve that fits around it.  You can clearly see the billowing flow of ABS in the picture.  ABS was only leaking on the side of the PEEK barrel where the spacer bolt was loose.  That part is straightforward.


The vertical ellipse on the right hand side of the hot end is much more ominous.  If you look closely, you can see that one of the thermistor leads has exposed above the sleeve leading down to the extruder tip where the extruder is housed.  A bit over 4 mm of exposed thermistor lead is open to the air.  You can see that happening a bit more clearly with this picture.


The larger red circle encloses the exposed lead.  The smaller one shows the recession of the purple plastic insulation on the lead that occurred once the ABS began to boil out of the gap between the PEEK and the aluminum and contacted the lead.


At first I thought that the hot ABS had actually caused the gap in the insulation.  Closer inspection, however, revealed that the lead had most likely been stripped too liberally and originally was only just barely covered by the yellow silicone sleeve.  The heat of the billowing ABS almost certainly caused the shrinking of the insulation from just being covered by the silicone sleeve to its present situation.  It's easy to see the shrinkage in the second circle.


I then removed the PEEK cylinder from the aluminum extruder head.  Originally, I had thought that the PEEK sleeve in contact with the aluminum might have shrunk.  It measured 10.09 mm outside of the aluminum sleeve and 9.9 mm inside.  That could have been either because of heat shrinkage of the PEEK over time or some sanding of the PEEK tube at the factor to get a clean fit.  Unless the parts had been measured before the hot end was put into service, it would be impossible to tell for certain.


I then removed the silicone tube from the inside of the PEEK sleeve as you can see here.


This is the most revealing forensic evidence in the whole exercise.  At first, it appears that the silicone tube has shrunk on the hot end.  While that is true to an extent, the reason for the shrinkage is actually because the inside diameter of the PEEK sleeve has shrunk because the PEEK has expanded within the confines of the aluminum sleeve.


It was fortunate that I bought several unassembled hot end kits before BfB began making premade ones because I had some disassembled PEEK and silicone tubes.  The unused PEEK sleeves had an outside diameter of 10.0-10.1 mm and a consistent inside diameter of  6.36-6.40 mm.


When I measured the failed PEEK sleeve the cold end inside diameter was 6.40 mm but the hot end had been reduced to 5.88-5.92 mm.  The silicone tube outside diameter on the hot end was more or less the same as the inside diameter of the PEEK sleeve.


What was revealing, though, was that the hot end of the silicone tube was virtually entirely closed.  It was impossible to slide a 2.9 mm ABS filament through it.  I was able to blow tiny bubbles through the silicone tube into a glass of water.  What that says is that the ABS filament was being melted in the silicone tube and squirted into the aluminum extruder barrel rather than being melted in the extruder barrel.


I don't think that that was how the hot end design was intended to work.


Getting back to that exposed thermistor lead, it is well known that blowing hot air past plastic surfaces will create a static charge.  Not only was that exposed lead within millimeters of billowing hot ABS it was also touching the bottom acrylic plate of the x-axis carriage {part 10034}.  Periodic static discharges off of this heated acrylic surface were most likely at least deranging the temperature measurements off of the thermistor and also causing the MCU board to reset.  During last winter, I walked in socks across the floor and picked up sufficient charge to where when I touched the MCU board the system reset.  


Conclusions:


The failure of the hot end had two aspects.  


  • The loosening of the spacer bolt, most likely from repeated heating and cooling cycles of the hot end allowed for a hot end misalignment that created a path for leakage of hot ABS out one side of the hot end between the aluminum extruder sleeve and the PEEK sleeve for the silicone tube.
  • The swelling of the PEEK sleeve over time reduced it's inside diameter almost entirely closing the silicone tube and causing the ABS to have to melt in the silicone tube rather than in the aluminum hot end.  This was certainly not the intent of the hot end designers.

It seems quite obvious that the combination of a PEEK sleeve enclosing a silicone sleeve for the plastic filament need to be rethought.

The placing of an MDF plate and an acrylic plate at the top of the hot end spacers through which the securing bolt has to pass also needs some careful.  Replacing the MDF with a PEEK plate with the bolts secured by lock washers to the PEEK plate and recessed through the acrylic with the acrylic and PEEK secured by a separate trio of short bolts might be more successful.  An aluminum plate as a replacement for the MDF might also be considered.

Tuesday, October 19, 2010

Chylld is a parts design genius


As I mentioned earlier I replaced to destroyed 0.3 mm hot end with one of my spare 0.5 mm hot ends and began to get used to using the larger nozzle size.  After some frustrating tries at adjusting flow rates Nophead suggested that I stop fiddling with things and just use the settings that I'd used before.  He was right, of course.

A quick print of some of the bones of the hand yielded good results, so I decided to have a try at one of Chylld's corner replacements for Rapman cut acrylic.


So far there's been no sign of the wall-to-wall resets I was getting with my Rapman in the hours before the 0.3 mm hot end finally failed.


The corner block printed in 2:15 and  mounted with a minimum of drama.


There was a minimum of post print part processing required.  the x-axis bar was a little tight, but a brushing out of the hole cured that.  All bars had a tight, friction fit and the tightening screws were largely cosmetic except when the printer wanted moving.

Chylld is a parts design genius.  I've never seen anything work quite this easily.